
Diamond drilling is ideal for drilling holes in some of the world’s most robust materials. Other drill bits may not be able to provide clean cuts because no other material is more rigid than the diamond. Diamonds can cut through most materials when attached to a drill bit. It also produces fewer chips and cracks, becoming a cost-effective solution by replacing the other expensive options.
Whether it is for your newly tiled bathroom or an existing one, drilling holes in tiled walls is a common task, anything you want to mount to the bathroom wall – from a geyser to the toilet paper rolls or a soap dish- will require you to drill through the tile. It may look like a simple, straightforward task, especially if you are a DIY person unfamiliar with various types of tiles and their characteristics. But before you choose to drill through tiles, please ensure that you know how to drill through them, as tiles are generally quite fragile. Even if you are CTI certified, the slightest mistake can damage the tile.
Fortunately for you, diamond drilling Kent has plenty of tips that can explain how to drill through tile without breaking it. However, no one guarantees that following some specific steps will not create a crack in the tile, but they will surely minimise the chances of damage significantly.
Identify The Type Of Tiles
The primary thing to pay attention to is to know your tile type thoroughly. Knowing the material of the tile will help you understand the size of the task in a better way. There are three types of materials for tiles :
- Glossy Ceramic Tiles: It is the most common type of tile found in old structures and the easiest to drill through.
- Glass Tiles: They can break if it is not drilled correctly. Use high-quality diamond bits, water for lubrication, and drill slowly.
- Porcelain Tiles: Harder to break through than ceramic tiles as they are dense. Requires more preparation than cutting through other types of tiles.
However, to drill through any of the tiles mentioned above, you first need to find out what material tile you have. You may risk an accident if you do a drilling operation in a tile without knowing it.
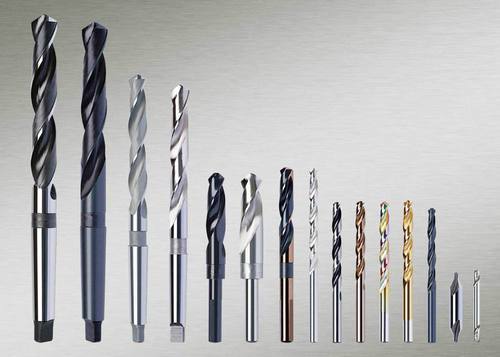
Choose the Right Bit
Regular drill bits do not work on tiles. It would help if you had a carbide drill, while the porcelain and glass tile needs diamond-tipped bits from diamond drilling Kent. Regardless of the material you want to drill through, please do not use old or worn-out drill bits, as they will not be able to perform the drilling process effectively.
It would be beneficial to invest in safety gear such as goggles and a dust mask before you begin the drilling process to save yourself from dust particles.
Measure It Twice
They say the diamond drilling industry measures it twice and cuts it once, and it perfectly suits the consequences of drilling the wrong hole in a tile. It would be beneficial to measure until you are satisfied with the result.
If you have tried drilling the tile, keeping the drill steady on the surface is challenging when you begin drilling. A proper grip on the tile creates tension, and masking tape will boost it. It will give you adequate surface area to grip the drill. Please measure the size, mark it with an X, and keep masking tape over it; measure it again to ensure you have not taken the wrong measurements.
Create a small template with a small wood block for the multiple holes. Bore a hole through the wood of the same diameter with the drill bit and keep it over the area of the tile you are drilling, making the gap a guide for the drill.
There are also unique accessories available to increase the accuracy of drilling. They are called drill guides and come in the form of a plastic casing attached to the tile, almost similar to the wooden block technique described above.
Drill Slowly and Accurately
Now the next step is to start drilling! Please do not rush through the process because you may damage the tiles. However, it may not be challenging as tiles are designed to withstand a lot of abuse, which makes them resistant to drilling.
Patience is the virtue to keep while drilling through a tile. Drill at a slow and steady speed. Drilling at full speed will overheat everything and create unnecessary vibrations that will harm the surface. It might take some time before you penetrate the tile surface.
After penetrating the initial layer, increase the speed gradually to reach the wall. Once you hit the wall, change the drill bit to suit the wall material.
Cool the Drill Bit
Your drill bit has to be cool to prevent overheating. You can either use a wet sponge to cool it down or spray some water on it from time to time. Please ensure you do not pour water into the motorised part of the drill.
It is important to note that carbide drill bits stop working when overheating, and it is mandatory to keep them cool during the drilling procedure. Diamond drill bits continue to work even when heated as long as you cool them down regularly. However, it would help to increase the lifespan of the drill if you drill slowly and lubricate the drill to keep it cool.
Key Takeaways
If you do not follow the instructions for the tile drilling, you may damage the tiles. Some other points mentioned below to keep in mind while drilling the tiles:
- To ensure the use of the right drill bit.
- Keep the drill bit lubricated.
- Slow and steady drilling and carrying out the task with patience.
Do you think we skipped any point in tile drilling? Leave us a comment on Facebook, and we will try to incorporate them into this article.
Also Read: Ace Sales Race Use Custom Candle Boxes