
Building Multi-Lingual Apps has become one of the most popular categories these days. It makes communication, learning, discovery, and achieving thing much easier than ever before.
Table of Contents:
Introduction
- What is a multi-lingual power App
- Use of multilanguage Function in PowerApps
- Tips for building Multi-language Apps
Conclusion
Introduction
In Microsoft PowerApps, we can use language localization, which means making your App available in many languages to reach more audiences. When working with the PowerApps multilingual, you will think about what this word means, so let’s know what it is Multi-lingual.
What is a multi-lingual power App
In simple terms, multilingual means many languages; you can be a multilingual person who knows many languages, despite being an American. Similarly, it’s the case with PowerApps Multilingual; it defines many languages localized in PowerApps.
Example: someone doesn’t know another language besides their mother tongue and wants to search in Chrome, so you must set the Language in which you want to see the content.
Localization is the process of offering a specific service to the audiences in a particular region.
However to know better insights on Programming & Frameworks definitely Power Apps Training Course plays an important role
Use of multilingual in PowerApps
We can use multilingual in the PowerApps, when we create a PowerApps App and that App will be used in California. Then, in that case, we use the PowerApps Multilingual to show the Language according to the area to the users. Those users can select the Language accordingly and use the App.
Tips for building Multi-language Apps
To make your PowerApps collect more user-friendly with multi-language options, some of the tips for building Multi-language Apps are below:
1. Creating Multilingual PowerApps using Localization
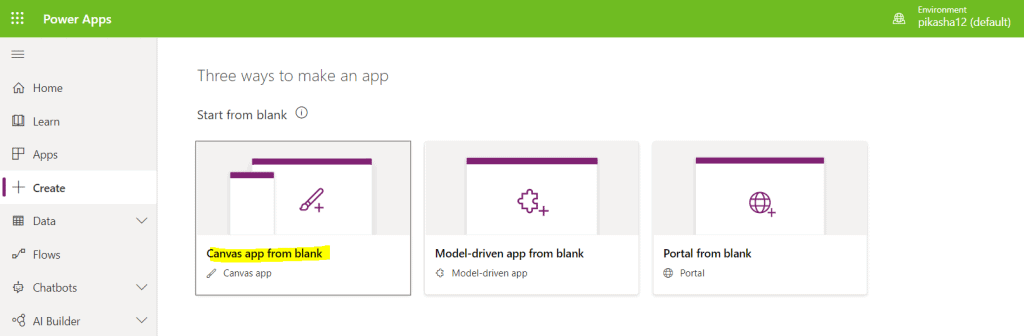
Step 1: Sign in to the PowerApps – create a canvas App from the blank and choose one layout: tablet or phone.
Step 2: Then, drag and drop your required control; the first step is to remove hardcoded strings from the multilingual App, meaning all those texts and messages available to the user must be taken out of the App.
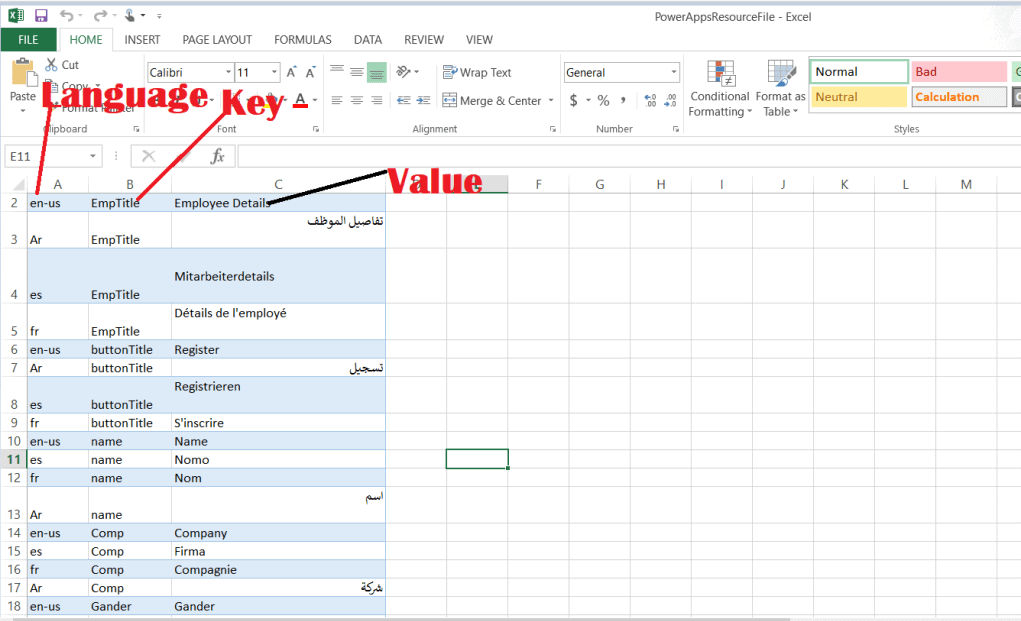
Step 3: Create an excel file spreadsheet as a table with three columns:
- Language Name: where you will store your required Language
- Key: key and value pair standard for one value, store keys like ProdName, ProdTitle, etc.
- Value: in this column, you will store your Company Name, Contact, and Company Name here
Remember, in the PowerApps multilingual, the resource file expects the ‘key’ and the ‘value.’
Note: Make sure to use an excel file to store your data and Excel sheet in OneDrive.
Step 4: go to the PowerApps page and Data Source and Search Import from Excel.
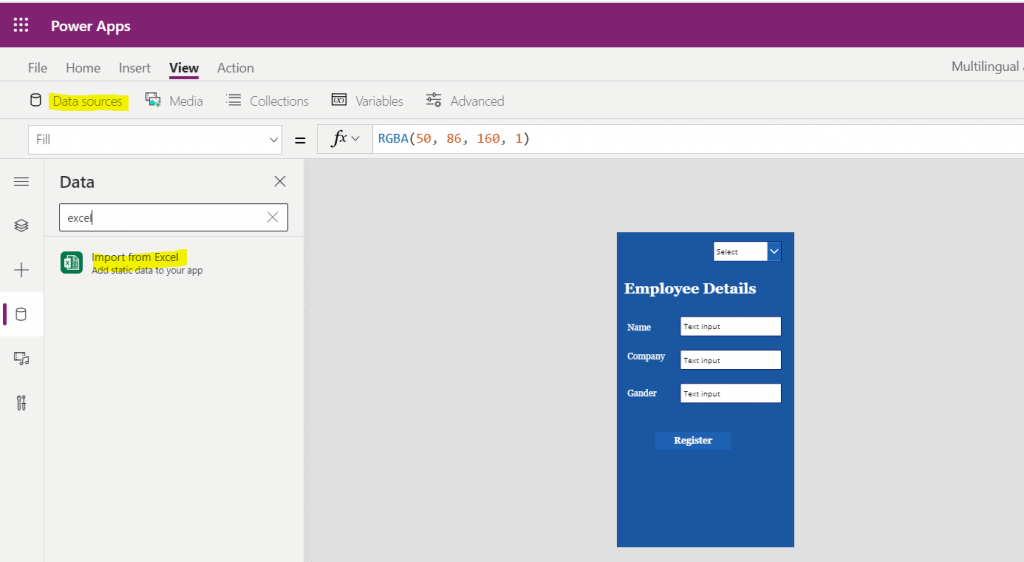
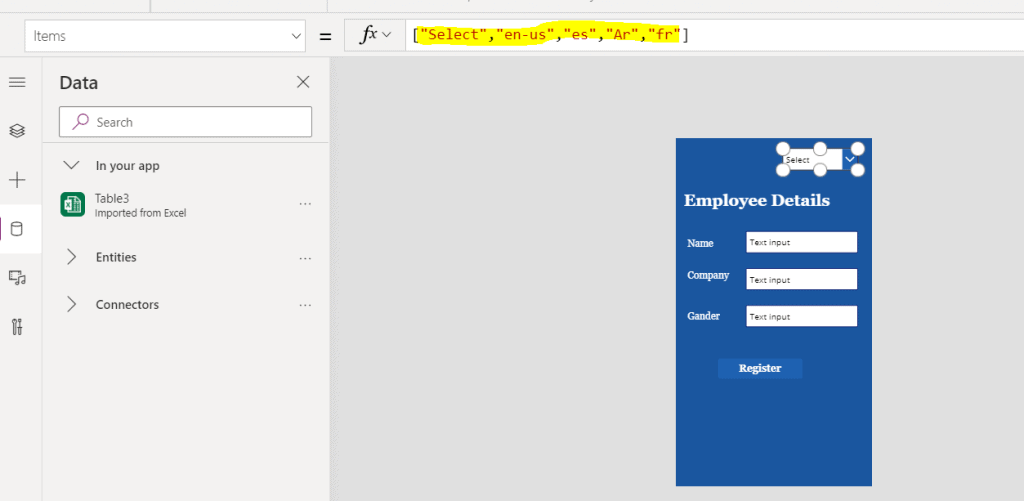
Step 5: then drag and drop the drop-down box to add the language name the user will select. In the Drop down, go to the item property and add the user’s preferred Language.
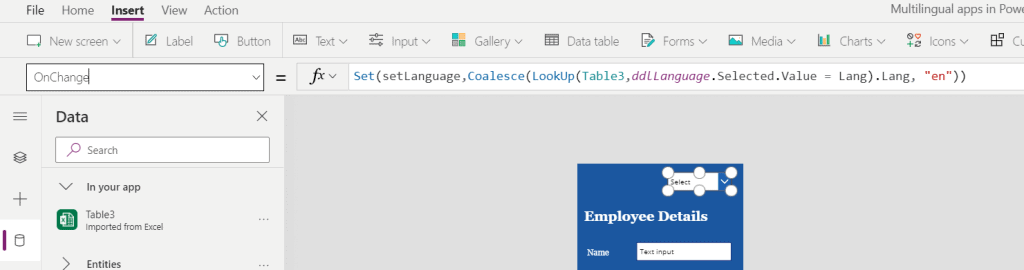
Step 6: go to the OnChange property, and add the code
Set(set language,Coalesce(LookUp(Table3,ddlLanguage.Selected.Value = Lang).Lang, “en”))
- Here, we created a global variable setLanguageCoalesce, a PowerApps function that converts an empty string to blank values.
- Lookup: the function helps to find the first record in the Excel sheet
- Table 3 is the table name of excel, and Lang is the first column name of excel.
Step 7: Next, you must remove the plain text from the other control using the formula to check the key and return the value from that Excel sheet.
LookUp(Table3,Key=”EmpTitle” And Lang=setLanguage,Value)
LookUp(Table3,Key=”name” And Lang=setLanguage,Value)
LookUp(Table3,Key=”Comp” And Lang=setLanguage,Value)
LookUp(Table3,Key=”Gander” And Lang=setLanguage,Value)
LookUp(Table3,Key=”buttonTitle” And Lang=setLanguage,Value)

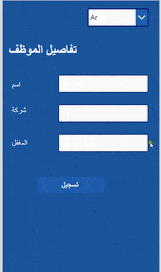
Step 8: Save your App and preview the App to check. See below how the Language is being changed in the Drop down, and the other text is changing accordingly per the Language selected.
2. Using Components to create Multilingual apps
By this method, learn how to create an app with a multi-language feature by following the steps:
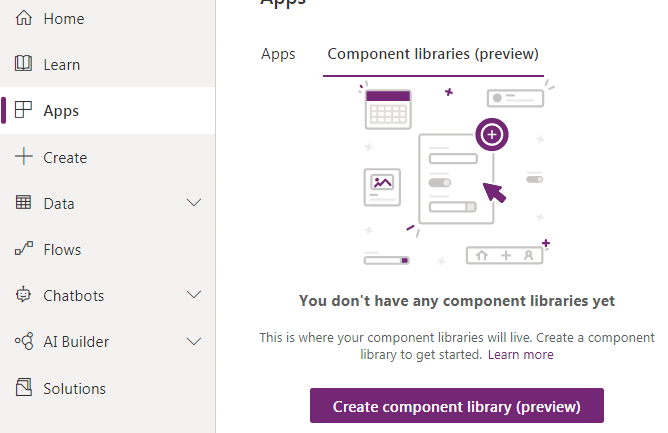
- First, create a component library
- Then for the Language, build a Custom property that will receive the current area ID for the current user
- You have to create a custom property that will reveal the translated labels based on the input property for the output.
- To create a table with new titles in different languages, use the Set{ } function in the OnReset property
- Write a formula in the output function to find the correct translation based on the input given.
- Lastly, save and publish the component library to use in your App.
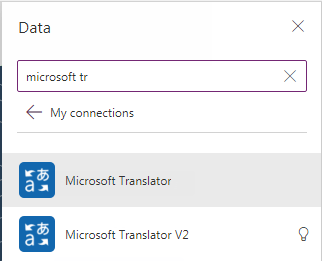
3. Using Microsoft translator connector to create a multi-language power app
Microsoft translator is a connector in PowerApps that shows translated text on your App.
Microsoft Translator Syntax
Microsoft translator.Translate(Source.Text, TargetLang.Selected.Value)
- Step 1: you have to add a Microsoft translator to your App
- Step 2: Add a drop-down list
- Step 3: To make your App to support all the languages, set this formula in the item property of the drop-down list
MicrosoftTranslator.Languages()
But, to add a specific language in your App, apply this formula in the item property of the drop-down list as below.
[“en,”” ar”,” fr”,” us”,” hi”]
Write the languages correctly to ensure PowerApps identify the Language the user will select according to the preference from the drop-down list.
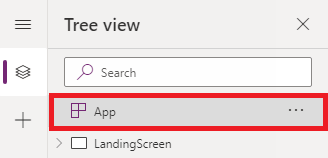
- Step 4: Create a global variable for all screens in your App to capture the user language.
- Select the OnStart option from the tree view in the app section.
- Write the formula given below:
Set(lang,”en”)

Lang is the variable name,
‘en’is the English Language
After creating the variable, press Run OnStart

Step 5: Write this formula: Set(Lang,LanguageDropdown.Selected.Value) in the OnChange property of the drop-down list.
Step 6: Lastly, apply the translation for every text written on the screen
For example, write this formula instead of the text in the text property
MicrosoftTranslator.Translate(“Book for an existing meeting”,lang)
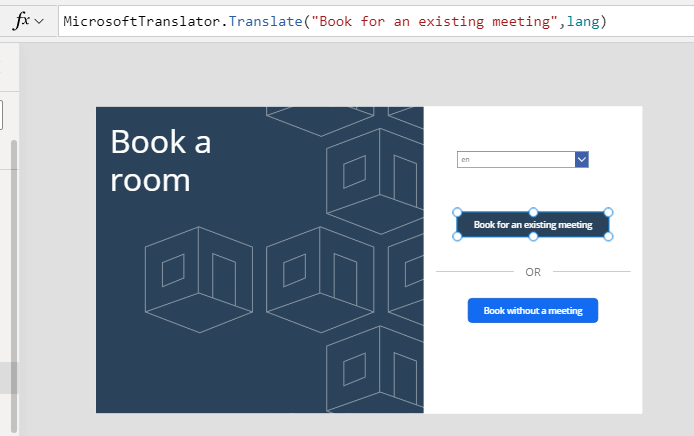
Now, the process is done, and the user can choose his/their preferred Language of the App by changing the drop-down list value. It’s how to build a multi-language app in the PowerApps using Microsoft translator.
Conclusion
So, we learned how to create a multi-language app in PowerApps. There are many other ways to create a multilingual app, like Localization in PowerApps and Microsoft translator. It makes communication easy in the world of Globalization. As we know, language barriers can create a lot of disturbances, but with the help of this feature, Chrome can adjust itself according to its user. This is it; now, learn step by step through the guide on how to change the Language according to your need.